Solar Panel Removal and Reinstallation on a Tile Roof in California (2026)
Helios charges $250–$350 per panel for solar R&R, and tile roofs land at the top of that range — about $6,000–$7,000 for a typical 20-panel system, with the roofing quoted separately.
By Taylor Crouse — Founder, Helios Energy GlobalPublished
Quick answer
- Helios charges $250–$350 per panel for solar removal and reinstallation — about $3,750–$8,750 for a typical 15–25 panel system, with the roofing quoted separately.
- Tile roofs land at the top of that per-panel range — about $6,000–$7,000 for 20 panels — because every attachment means lifting and relaying tile by hand; simple single-story shingle jobs land at the bottom.
- Expect a broken-tile allowance of 5–15% of the tile count; clay tiles crack more readily than concrete during removal.
- The job requires two licensed contractors in sequence — solar first out, roofer completes work, solar back in — and a new building permit in most Southern California jurisdictions.
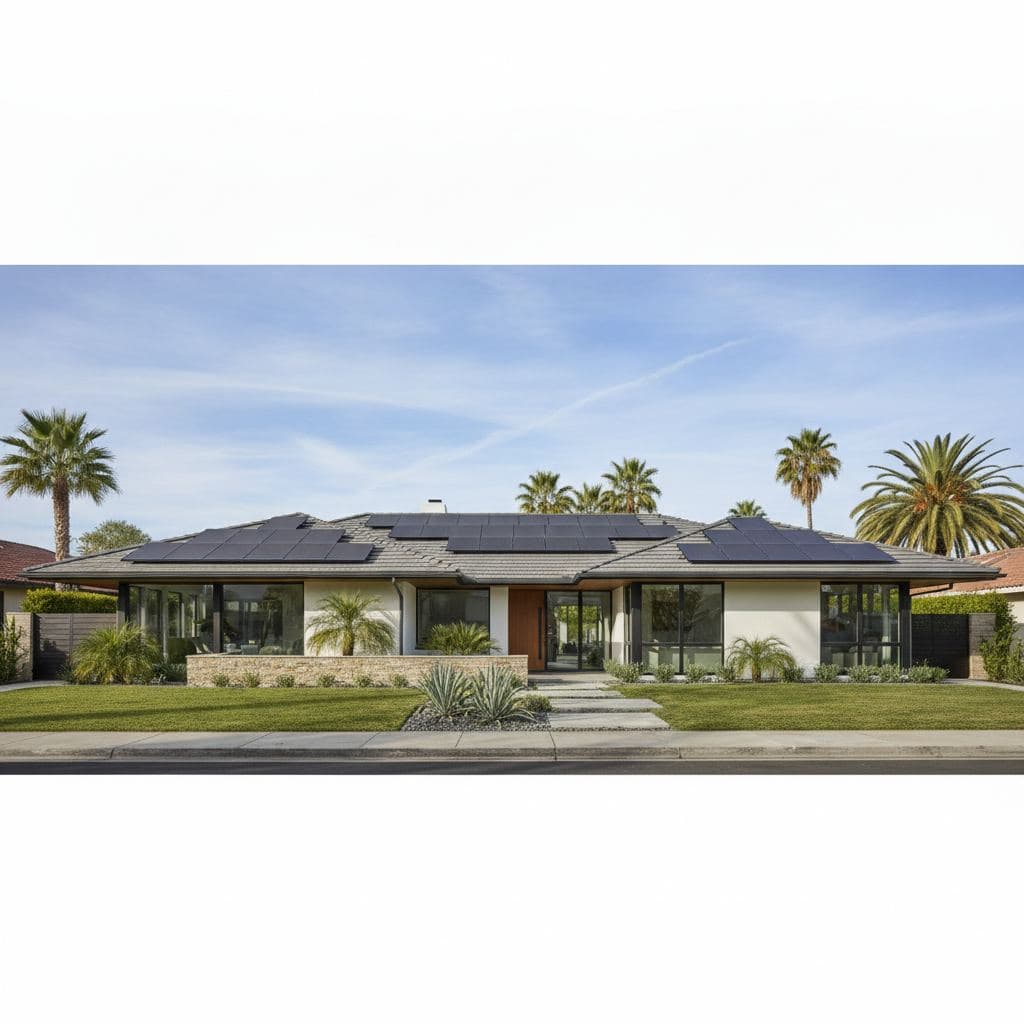
Helios charges $250–$350 per panel to remove and reinstall solar panels on a clay or concrete tile roof in Southern California, and tile lands at the top of that range — about $6,000–$7,000 for a typical 20-panel system. That per-panel price covers the whole job: labeled, padded storage on site, new flashing and mounting hardware at every attachment, reinstallation in the documented layout, recommissioning and production verification. The roofing itself is quoted separately, by your roofer or our licensed roofing partners. Tile costs more than simple single-story shingle, which lands at the bottom of the range, because every mounting point on a tile roof requires individual tiles to be lifted, set aside without cracking, and relaid — a slow, skilled process that shingle work simply does not require.
Last verified: September 2026 by Helios Energy Global.
Why tile R&R costs more per panel
On a comp-shingle roof, a crew slides a flashed lag bolt under the shingle, drives it into the rafter, and moves on. On a tile roof, the sequence at each standoff is: lift the overlapping course above, remove the tile at the penetration point, set it safely aside, pull or reset the standoff, re-flash, relay the tile, and check alignment. Multiply that by 20–40 standoff points on a typical residential system and you have a half-day of additional skilled labor before a single panel moves.
Shingle roofs are simpler to work with, while tile and metal roofs require more care, time, and specialized materials — and tile roofs often require new attachments to ensure proper sealing and prevent leaks.
Concrete and clay tile require specialized tile hooks that replace individual tiles at attachment points, adding complexity and cost. That hardware cost — plus the labor premium — is why tile R&R quotes run higher even when the panel count is identical to a shingle job next door.
The broken-tile allowance
Tile breakage during removal is not a contractor error — it is physics. Clay tile becomes more brittle with age and UV exposure; concrete tile is more forgiving but still chips at edges when pried. Any honest quote for tile-roof R&R should include a broken-tile allowance of roughly 5–15% of the tile count in the work zone. On a 2,000-square-foot roof with 1,000 tiles under the array, that means budgeting for 50–150 replacement tiles.
What this means in practice:
- Ask your contractor how many replacement tiles are included in the quote, and at what per-tile cost if you exceed the allowance.
- Clay tile (common in older Spanish-style homes in Santa Monica, Pasadena, and San Marino) breaks more readily and matching color/profile on discontinued runs can be expensive or impossible.
- Concrete tile (more common in 1990s–2000s Inland Empire and South Bay tracts) is more forgiving but still requires matching the profile and color lot.
- Stock a tile reserve. If your original roofer saved extra tiles in the garage or attic, flag this for your solar contractor before work starts — it can save $200–$800 in sourcing costs.
Tile hooks vs. comp flashing: what changes at reset
A tile hook is a purpose-built stainless-steel bracket that slides under the tile above the mount point, attaches to the roof deck or rafter, and pokes a small foot through the tile course below. The surrounding tiles are lifted temporarily, the hook is flashed properly with lead or EPDM, and the tiles are re-laid around it.
When a system was originally installed using comp flashing (a method where tiles are cut or ground to accept a standard shingle-style flashing), the reset is more complex. Cut tiles cannot be uncut; if the original install used grinding or permanent cuts, the reset requires either fabricating custom flashing or sourcing replacement tiles that fit the modified opening. No tile should ever be ground down or permanently sealed to accommodate a mount — that approach causes long-term leaks and voids most tile warranties.
At reset, a good contractor will:
- Inspect every existing standoff for corrosion and replace any that show rust bleed or thread damage
- Re-flash each penetration with fresh lead or EPDM rather than relying on the original sealant
- Verify rafter engagement — lag bolts that were borderline at original install may have lost thread purchase after years of thermal cycling
- Torque all connections to spec and document with photos for the permit inspection
Per the 2025 California Residential Code, photovoltaic panel systems mounted on top of a roof shall be listed and labeled in accordance with UL 2703 and shall be installed in accordance with the manufacturer's installation instructions. This applies at reinstallation just as it does at first install — the permit inspection will check compliance.
Key numbers at a glance
| Item | Comp-shingle R&R | Tile R&R | Notes |
|---|---|---|---|
| Helios price per panel | $250–$350 (simple single-story shingle at the bottom) | $250–$350 (tile at the top) | Covers the whole job |
| Included in the per-panel price | Labeled, padded storage on site; new flashing and mounting hardware at every attachment; reinstallation in the documented layout | Same | Plus recommissioning (with utility/AHJ notification where required) and production verification |
| Broken-tile allowance | N/A | 5–15% of tile count | Clay > concrete for breakage rate |
| Replacement tiles | N/A | $3–$15/tile + sourcing | Discontinued profiles cost more |
| Quoted separately | The roofing itself; off-site storage beyond 30 days; failed components found during the detach | Same | Failed components are flagged with a price first |
| Total, typical 20-panel system | $5,000–$7,000 | ~$6,000–$7,000 | Roofing not included |
The per-panel price is Helios's; the tile figures are Southern California 2026 estimates. Where your job lands in the range depends on system size, tile type, roof pitch, and hardware condition. Get the per-panel price and what it includes in writing.
Sequencing with your roofer: who goes first, who goes last
This is the single most common mistake in tile-roof R&R projects: the homeowner books the roofer and the solar contractor independently, without coordinating the handoff. The result is scheduling gaps, panels sitting on the driveway longer than necessary, and — in the worst case — the roofer starting work before the solar crew has pulled the system, damaging wiring or conduit runs.
The correct sequence:
- Solar contractor removes panels and racking. Panels are stacked on-site (covered) or in storage. The inverter and disconnect remain in place unless the roofer needs access to that wall.
- Roofer completes all work — new underlayment, tile relay, flashing at penetrations, ridge caps. The roof must be fully dried-in and inspected before solar re-enters.
- Solar contractor returns to reinstall racking at original or revised standoff locations, re-flash all penetrations through the new tile course, reinstall panels, re-wire, and test.
- Permit inspection covers both the roofing and the solar reinstall — in most Southern California cities these are separate inspections, so confirm with your building department.
- Utility reconnection — SCE or LADWP must re-energize the interconnection. For SCE customers on NEM 3.0 (the Net Billing Tariff), confirm with SCE that your interconnection agreement remains active during the outage window; a gap of more than 180 days can trigger a new application.
If your roof is reaching end of life — typically 40–50 years for tile — solar panels must come off so roofers can replace decking, underlayment, and tile. Coordinate both scopes under a single project timeline whenever possible.
Helios tip: We recommend getting the roofing and solar R&R quotes at the same time and presenting both contractors with a shared schedule. When we coordinate both scopes — with your roofer or our licensed roofing partners — we build a single mobilization plan that eliminates the scheduling gap and reduces total project time by 3–7 days on average.
SCE vs. LADWP: does your utility affect the R&R decision?
The physical work on the roof is identical regardless of utility. But the financial urgency of getting your system back online differs meaningfully between SCE and LADWP customers.
SCE customers (most of coastal and inland SoCal):
SCE rates are current as of June 1, 2026 , and the average residential rate runs approximately 34–35¢/kWh, with 4–9 PM peak rates significantly higher. Every day your system is offline, you are buying grid power at those rates. On a 10 kWh/day solar system, a two-week outage costs roughly $50–$70 in extra electricity charges at current SCE rates — not catastrophic, but a real number. More importantly, SCE customers on NEM 3.0 should confirm their interconnection status in writing before the project starts.
LADWP customers (City of Los Angeles): LADWP is a municipal utility and is not on NEM 3.0. LADWP still offers retail-rate net metering, which means your export credits are more valuable than an SCE customer's. That makes getting your system back online quickly even more financially important — every day offline is a day you are not earning retail-rate credits for excess generation. Confirm your LADWP interconnection agreement terms before scheduling R&R.
Other Southern California municipal utilities — Pasadena Water and Power, Burbank Water and Power, Glendale Water and Power, Anaheim Public Utilities, Riverside Public Utilities — each run their own net metering programs and are not on NEM 3.0. Check with your utility before scheduling to confirm your interconnection remains active during the work window.
Tile-roof-specific failure modes after reset
A tile-roof reinstall done carelessly creates problems that may not surface for 6–18 months — long after the contractor has left. These are the failure modes we see most often when homeowners call us to fix a prior installer's work:
1. Cracked tiles from improper lifting technique Tiles should be lifted from the bottom edge, not pried from the side. Side-prying concentrates stress at the nail hole and cracks the tile along the lug. The crack may not be visible immediately but will propagate under thermal cycling and allow water infiltration within one or two rainy seasons.
2. Leaks at standoffs from inadequate re-flashing
Mounting hardware exposed to Southern California heat for 10–15 years doesn't always cooperate. Lag bolts corrode, flashing bonds to the roof, and older racking systems may not be compatible with a new roof material. At reset, every penetration must be re-flashed with new material — not resealed over old dried sealant. If the original flashing used roofing tar or silicone-only sealing (no lead or EPDM boot), it needs to be replaced at reset, not reused.
3. Misaligned tile courses after relay Tile is a dimensional material — each course overlaps the one below by a specific amount. If tiles are relaid out of sequence or at a slightly different overlap, water can channel under the course at the break point. A qualified tile roofer (not just a solar crew) should verify tile alignment after the solar contractor completes the reset.
4. Racking incompatibility with new underlayment thickness If the roofing scope included replacing the underlayment (common on tile roofs over 20 years old), the new underlayment may be slightly thicker than the original, changing the standoff height. This can put lateral stress on the rail-to-standoff connection if the crew does not re-shim or adjust. Always confirm with both contractors that standoff heights are verified after the new underlayment is installed.
5. NEC 690.12 rapid-shutdown non-compliance
California requires rapid-shutdown compliance under NEC 690.12. If your original system was installed before 2019 and used module-level electronics that pre-date the current rapid-shutdown standard, reinstallation may trigger a code upgrade requirement. Confirm this with your solar contractor before the project starts — any required upgrade should be priced in writing before work begins, and it is non-negotiable for a permit.
Should you replace the underlayment while panels are off?
Yes — almost always. Tile roofs over 20–25 years old often have degrading underlayment. The tile protects the roof surface, but water vapor and attic humidity slowly compromise the underlayment over decades. If you're installing solar and your roof is 20+ years old, this is the right moment to replace the underlayment beneath the solar footprint — costs $3,000–$8,000 for replacement under the array.
The logic is simple: once the panels are off and the tile is up, the additional cost of replacing the underlayment is marginal compared to what it would cost to pull the system again in 5–10 years when the underlayment finally fails. We call this the "one mobilization" principle — do the underlayment now and you will not need another R&R for the life of the solar system.
Frequently asked questions about tile-roof solar R&R
How much does solar panel removal and reinstallation cost on a tile roof in California?
Helios charges $250–$350 per panel for removal and reinstallation, and tile roofs land at the top of that range — about $6,000–$7,000 for a typical 20-panel system. The roofing itself is quoted separately. Where a job lands depends on panel count, tile type (clay vs. concrete), roof pitch, and hardware condition. The per-panel price covers labeled on-site storage, new flashing and mounting hardware at every attachment, reinstallation, recommissioning and production verification. Get the per-panel price and what it includes in writing.
Why does tile-roof R&R cost more than shingle-roof R&R?
Shingle roofs are simpler to work with, while tile and metal roofs require more care, time, and specialized materials. Every mounting point on a tile roof requires individual tiles to be lifted, set aside without cracking, and relaid after the standoff is reset — slower, more careful work than shingle, which is why tile lands at the top of the $250–$350 per-panel range and simple single-story shingle at the bottom.
Do I need a permit to reinstall solar panels on my tile roof in California?
Yes, in virtually all Southern California jurisdictions. A reinstall is treated as a new installation for permitting purposes. Installing a solar energy system in California triggers various permit requirements based on your project's specifications, and building permits verify the structure can adequately bear the solar panel load. Most cities in LA County, Orange County, and the Inland Empire now offer online permitting through SolarAPP+ or equivalent platforms, which speeds up the process.
Will my solar warranty be voided by removal and reinstallation?
Proper R&R does not void panel or inverter warranties if done by a licensed installer. The key is documentation: your contractor should provide a written record of the work, including torque values, photos of each standoff, and the permit inspection sign-off. Keep this with your original installation paperwork.
How long does tile-roof solar R&R take?
For a typical 15–25 panel system, the detach is typically one day and the reinstall one to two days once the roofer is done, plus permit inspection time. The gap between removal and reinstall depends on how long the roofing work takes — typically 3–10 days for a tile relay or underlayment replacement. Plan for your system to be offline for 1–3 weeks total.
Can my roofer remove and reinstall the solar panels, or does it need to be a solar contractor?
In California, solar work — including disconnecting and reconnecting a grid-tied system — requires a C-46 Solar Contractor license or a C-10 Electrical Contractor license. Most roofing contractors hold a C-39 license only and cannot legally perform the electrical disconnection or reconnection. The physical panel handling (lifting, stacking) can be done by a roofing crew, but the electrical work must be handled by a licensed solar or electrical contractor.
What happens to my NEM 3.0 interconnection agreement with SCE during R&R?
Your interconnection agreement with SCE remains active during a temporary removal for roof work, as long as you notify SCE and the outage is within a reasonable window (generally under 180 days). Do not assume this — contact SCE's interconnection team before the project starts and get written confirmation. LADWP customers should do the same with LADWP's interconnection department.
Next steps
- Book a free consultation and custom design — we'll review your tile type, system age, and roofing scope and give you a realistic R&R budget before any work starts.
- See our full solar panel removal and reinstallation guide — covers all roof types, storage, and leased-system considerations.
- Explore our tile roof solar installation guide — the companion page covering first-time installs on clay and concrete tile.
- Understand your roof type and solar compatibility — side-by-side comparison of tile, shingle, metal, and flat roofs.
- Learn how NEM 3.0 affects SCE solar owners — important if your system will be offline during the billing period.
- Get the full solar cost picture for Southern California — all-in pricing by system size before any incentives.
- See our Southern California service locations — we serve Santa Monica, Los Angeles, Pasadena, the South Bay, Orange County, and the Inland Empire.
Sources
- SCE Rate Plan Comparisons — rates current as of June 1, 2026 — June 1, 2026
- California Residential Code 2025, Chapter 9 — Roof Assemblies & Rooftop PV (UpCodes) — January 1, 2026
- RateReliefCA — Solar Panel Removal and Reinstall Cost in California (2026) — April 16, 2026
- Helios Energy Global — Solar on a Tile Roof: Cost & Method Guide 2026 — August 24, 2026
More guides
Best Solar Companies in Carlsbad, CA (2026): Ranked for SDG&E, NEM 3.0, and Tile-Roof Homes
Carlsbad homeowners face SDG&E rates near 46¢/kWh and NEM 3.0 export rules that make battery-paired solar the default smart choice. This guide ranks the 10 best solar installers serving Carlsbad in 2026 — with honest notes on tile-roof expertise, SolarAPP+ permitting, and EV-charger integration.
ReadIs there a California solar tax credit in 2026? What homeowners actually get
California has no state solar tax credit, and the federal 30% credit expired December 31, 2025 — but a prepaid lease still delivers roughly 30% off in 2026.
ReadBest Solar Companies in Santa Monica, CA (2026): Honest Rankings for Local Homeowners
A straight-talking, numbers-first guide to the best solar installers serving Santa Monica in 2026 — with honest utility context, real price ranges, and no expired-credit hype.
ReadGet a free consultation and custom design.
No pressure, no obligation — the owner reviews every design we send.